New Tutorial :: Draping 101 - Trueing Front/Back Bodice Part 2 of 2
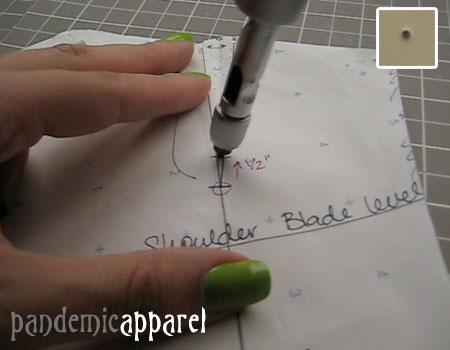
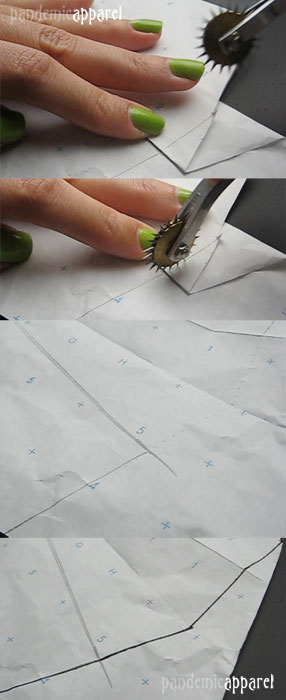
My new tutorial takes you step-by-step on transferring all of your muslin marking onto dotted paper & then onto manila paper. In pattern making one usually has two scissors one for cutting paper and one for fabric. Designers usually have many scissors, but two scissors should be the minimal amount you should have. Never use your fabric scissors for cutting paper & vice-versa.
I've added a PDF to my tutorial for anyone that needs a pattern card. I'll either do a tutorial explaining a pattern card or I'll start a blog post. Either way I'll explain how to fill out a pattern card at a later date.
Tips for Pattern Making:
I just had way too much info that didn't fit in my tutorial, so I'm including it in this blog post. Let me know if this information is useful to any of you.
• Circle Symbol:
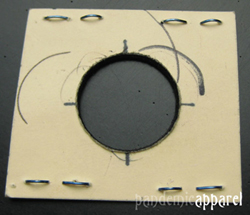
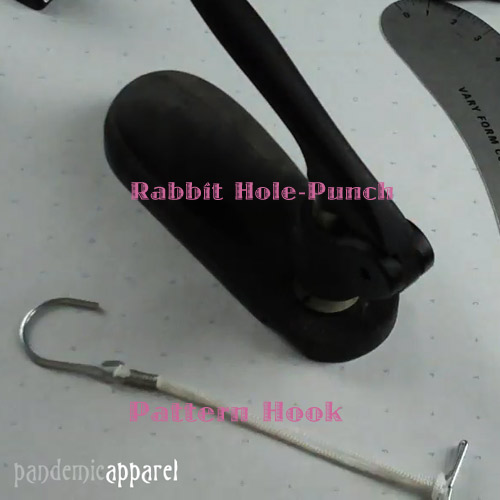
To make a perfect circle to mark the dart punch, I used a template. To make one all you'll need is a piece of manila paper & a rabbit hole-punch. First cut out a 2 inch squares (you'll need two of them), staple them together and punch out a hole using your rabbit hole-punch, then find the center and draw to lines. Drawing the two lines will help when trying to find the center.
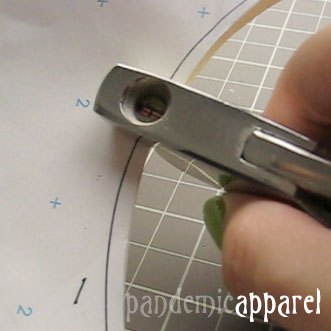
• Using the Notcher:
A tip when using the notcher, turn it up-side-down, you'll find you can accualy see the what you are doing and it will be more accurate.
• Tracing Wheel:
I store my tracing wheel in its original box with tape on the bottom, so when I need to take it out to use I don't prick myself in the process.
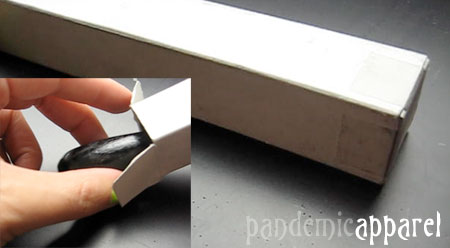
• AWL vs. Japanese Punch:
The Awl doesn't punch the paper, it just leaves a hole.
On the other hand the Japanese or Screw punch removes the paper, leaving the back of my patterns looking very professional. I prefer the Japanese punch, although I don't like getting out my cutting mat every time I need to use it. I have several Japanese punches, but the one I like the most is made buy Martha Stewart for $25. It has 3 different sizes and I generally use the smallest to make my dart punch.
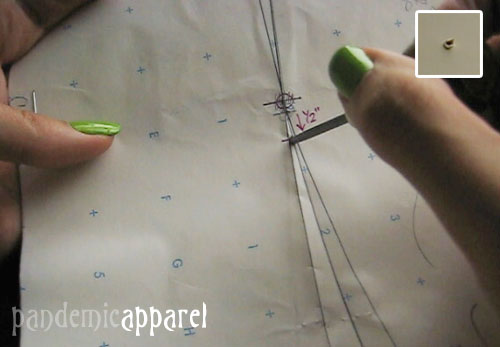
• Another use for the Tracing Wheel:
When the dart is folded you can't see the seam line between the dart. A trick is to close the dart and trace the seam line with the tracing wheel, now you have a clear view of the seam between the dart. Doing this can make it easier if you are having trouble cutting your patterns when the dart is folded or when adding seam allowances to your pattern.
• Visit PandemicApparel.com to watch this tutorial and to get detailed step-by-step instructions.
• And to view this tutorial on youtube.com, click here. Don't forget to subscribe to my youtube channel while you are there.
• List of Tools You'll need for Patternmaking:

Buying Supplies
• I usually go downtown to the fashion district to buy supplies. I've added a link if anybody is interested in buying these supplies online. The cost of shipping paper might be expensive, so try to find it locally.
You can find Basic Designer Package
Which includes: 1 Pattern Notcher 45N-1/16 Depth 1/4" Width 1/16", 12 Large pattern hooks for 1" and 1/12" pipes, 1 7" Needle Point & Pattern Tracer, 1 Awl (Punch Hole) 1 Package of Pins, 1 Seam Ripper, & 1 Measuring Tape. If you're starting out and need a starter kit, then this is for you.


Great Job! I love the videos! Lots of information and I am eager to learn how to create my own clothes!
ReplyDelete