Creating a Sleeve for your DressForm
I've been debating on making this post. In the end I think it would be easier to create a blog entry than to make a video tutorial.
I few weeks ago I purchase this "Draping" book which I've been trying to buy for some time now. I really goes into detail on the history of draping and how it all started. Which my school failed to teach us.
Okay ... its time for the draping part of this tutorial.
[I would like to add that this book deals with CM not INCHES so if you don't have a measuring tape with CM on it you'll need to do some converting here is the formula:
cm x 0.39* = in
in x 2.54 = cm
*Shown as 0.39 after rounding to the nearest hundredth (0.3937008).]
You'll need the following measurements: (size 6 US)
• Upper arm width (27cm)
• Elbow width (23cm)
• Wrist width (16cm)
• Arm length (61cm)
• Lower arm length (25cm)
• Arm hole circumference (40cm)
Supplies:
• Muslin Fabric
• Cardboard
• Poly-Fil
• Pins
• Rulers: L-Ruler, French Curve, Clear Ruler
• Thread: Black, Red, White
• Needle (for hand sewing)
• Sewing Machine
• Iron
Step 1: The book just tells you to draw in the lines from the image onto the fabric. I had to decipher the book which took a long time. They may have left some stuff out when translating the book or it didn't translate well into english. [For this tutorial I'll be making the right sleeve, if you want the left sleeve just mirror steps 3-7]
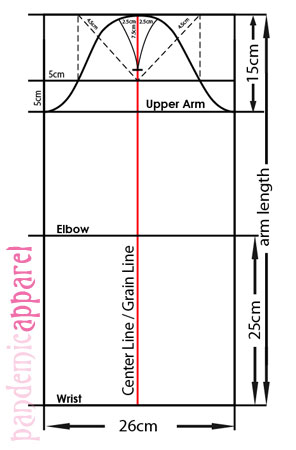
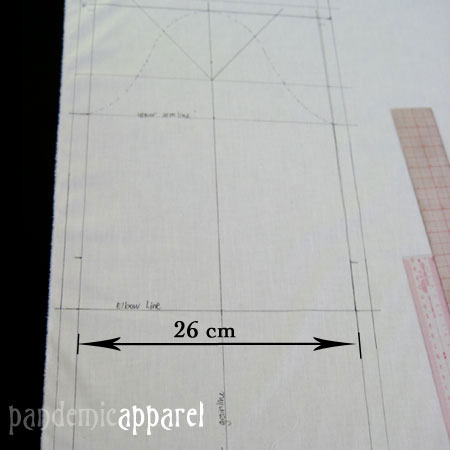
Step 2: make sure you have at least 1/2 inch of seam allowance around the rectangle then join the end seams, folding S.A. under and pinning. Put a ruler between the fabric, this will make it easier to pin.
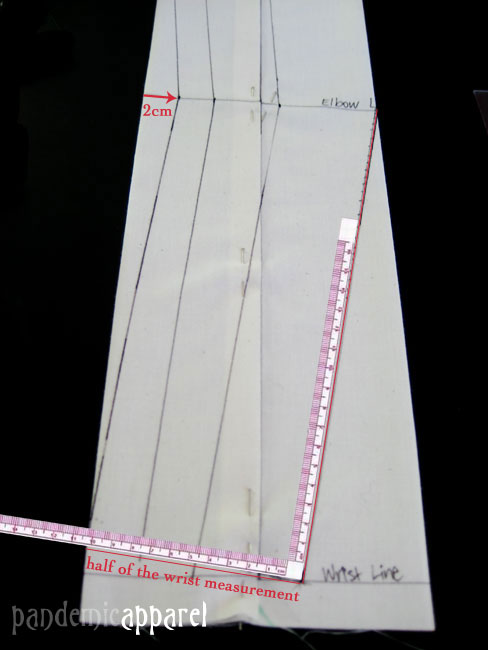
Step 3: Go 2cm in at the Elbow (measuring from left to right).The book just tells you to draw in the lines from the image onto the fabric. I had to decipher the book which took a long time. They may have left some stuff out when translating the book or it didn't translate well into english. [For this tutorial I'll be making the right sleeve, if you want the left sleeve just mirror steps 3-7]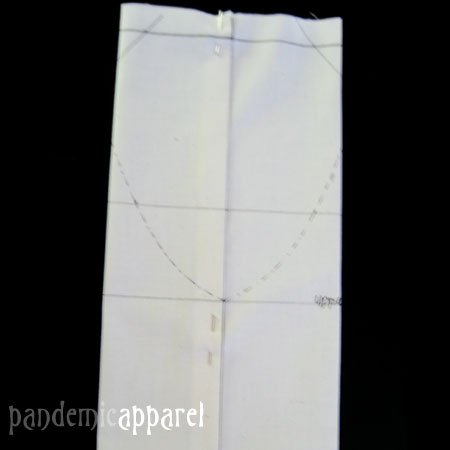
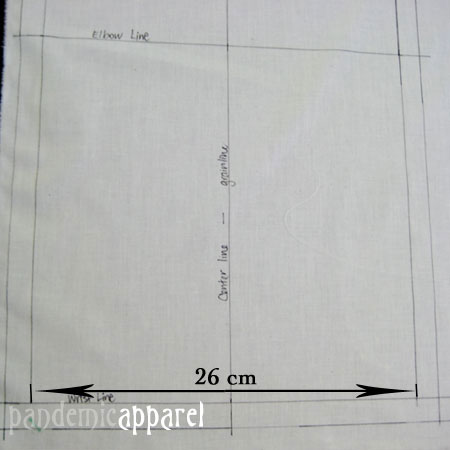
Step 4: Match up the following points: Elbow, Wrist, & Half of wrist measurement (use an L-Ruler).
Step 5: a.) Then match up the following points: Upper Arm, Elbow at the 2cm point, and at Wrist (see drawing for details). b.) Then draw a parallel line 2cm away from the line you just finish drawing.
Step 6: Finally measure the Upper Arm, Elbow & Wrist and divide by 2, then connect these points (This will be the "Inner Sleeve Seam").
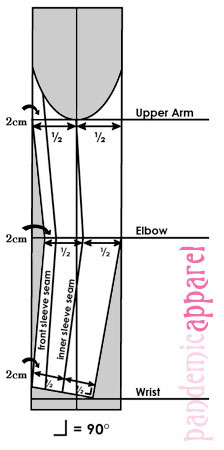
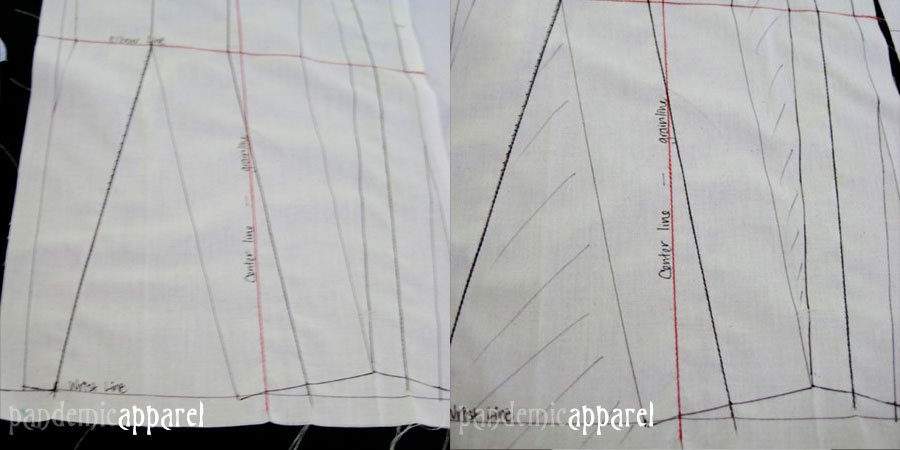
Step 7: Flip the fabric and transfer or measure again using step 3-6 omitting part b in step 5.
Step 8: Make sure you have 1/2 inch seam allowance all the way around & cut out.
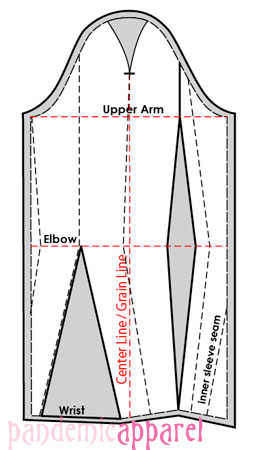
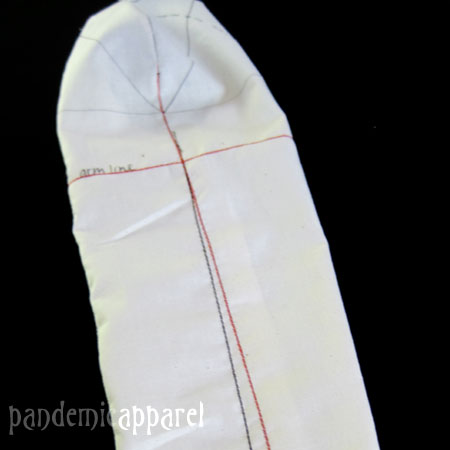
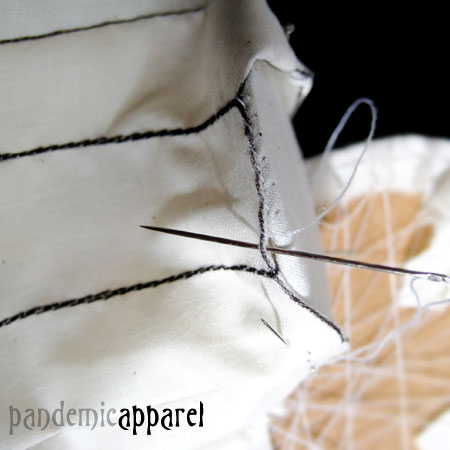
Step 9: Now its time to sew. Using RED thread, stitch the following points: Upper Arm, Elbow, Center Line/Grain Line. Stitch each line twice.
Step 10: Using BLACK thread, stitch all of the Black Dashes indicated in the image below. Stitch each line twice.
Step 11: Create the "Wrist and Arm Plate". a.) First make an oval for the wrist that measures (16cm), then make another one tracing off the armhole of the dressform (40cm). b.) The plates are made from cardboard and lined with muslin fabric, hand sewn closed. Letters A-C shows you how to attach the lining to the cardboard for the "Wrist Plate" & D is the "Arm Plate" using the same method.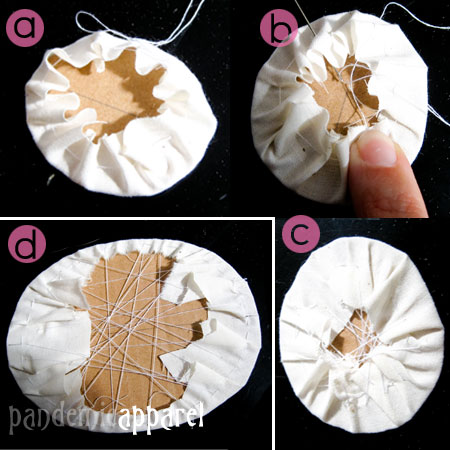
Step 12: a.) Sew the seam, the fish eye dart, the wrist dart, and cap dart using a sewing machine.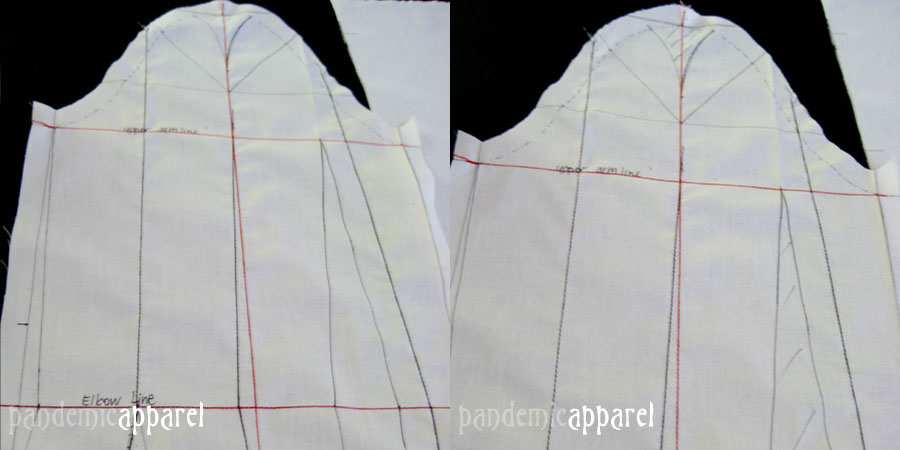
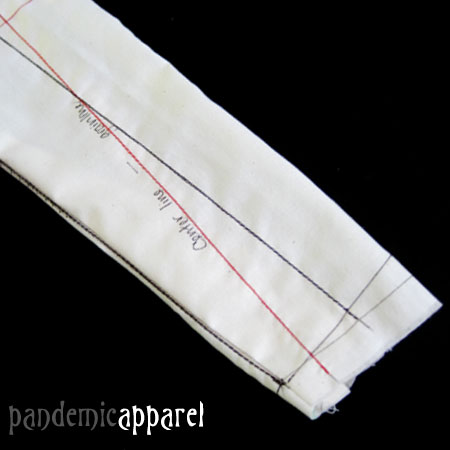
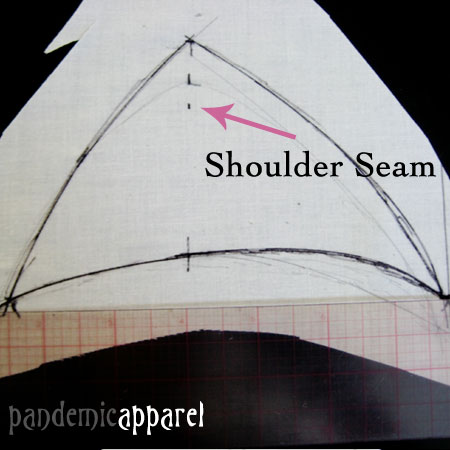
b.) And then sew the bottom wrist by hand, fill with poly-fil and attach the armhole plate by hand. Note: When stuffing the sleeve I really packed it in, because the one I made in school slowly got softer and softer the more I used it. I also copied the triangle style from the original sleeve. I just traced the shoulder marking the shoulder seam and then draw a kind of triangle. Then I sandwiched it between the arm plate and sleeve, then I hand sewed it closed.
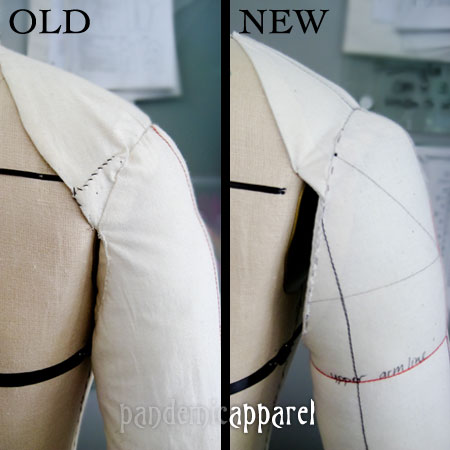
When attaching it to your dressform make sure that the center line/grain line is straight and matching up with the side seam. If they match up you know your sleeve is aligned properly.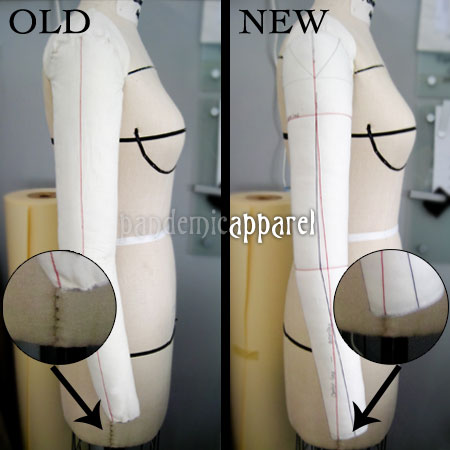
Hope this helps, sorry I didn't go into more detail. I didn't want to write a novel. But if you have any questions, please don't hesitate to ask. I'll try to answer them as best as I can.
The next Sleeve I make I will not put cardboard on the arm plate, because it doesn't sit right on my dressform. I will also make the triangle longer.

Wow I am so glad to found this perfect site for learning more about Fashion Design. I am very much appreciated of all of your tutorials.I have never seen such a detailed and step-by -step tutorial videos like yours. I love them so much!!!!! Thank you so much! :)
ReplyDeleteHi!-Thank you for sharing this! I came to your site thru pinterest looking to make an arm for my form. I already have a pair that came with my size 12 form but unfortunately they look unrealistic and they stick out way too much (They make the form look like a line backer! eek!)
ReplyDeleteCan you reference the book that you used? I would really like to make this one. Unfortunately, I am unable to make out the amounts around the cap area in your graphic.
Any help would be greatly appreciated!
Can you reference the book that you used?
ReplyDeleteThank you for the excellent tutorial. I am looking forward to using my arm form now. yay
ReplyDeleteHere's a link to my tumblr if you wanna see
http://manavolemoname.tumblr.com/post/78546992968/
Awesome, thanks for the link.
ReplyDeleteThank You!
ReplyDeleteVery helpful and needed. Thanks.
ReplyDeleteThank you so much for sharing this...
ReplyDelete